Friday, June 28, 2013

You've Got Mail!


I wish I could take credit for this adorable mail box pictured above but, I cannot. However, I did snag it at flea market for only $5!!! This teacher is pretty excited :) I plan to use this in my classroom for students to turn in doctor's excuses, money, and various signed documents. Last year, students would just run up to my desk at the beginning of the day and throw things onto my desk. This will allow me to keep my desk a little more organized. The best part? It is already painted a cute color. I may change it up on one point but for right now, I think I am going to keep it. Perhaps I should repaint it and add chevron? Thoughts?


I apologize for the short blog post but I needed to show off my awesome purchase. 

Thursday, June 27, 2013

No Name Papers!!!

Ugh. The bane of any teacher's existence. No name papers. It doesn't matter how many times you reiterate, please put your name on your paper. You'll still inevitably get those few students who do not put their name on their paper. Then, when you address the class "whose paper is this?," they look at you as if you're speaking an archaic language. Now, I am only going into my third year teaching BUT I have learned to be a reflective teacher and try to fix things that are broken. I have decided this year to make a "No Name" area. Another DIY project. This project was cheap, cheap, cheap and quick to do. I hope it will save me time and annoyance this school year.


Materials Needed:

  • Piece of wood
  • Clothespins (I bought mine already decorated in the $1.00 section at Michaels)
  • Modge Podge (of course!)
  • Small Foam Brush
  • Scrapbook Paper 
  • Cricut (optional, I used it to cut out my letters)
  • Hot Glue Gun
  • Ruler/Tape Measurer
  • Paint
  • Medium Foam Brush/Paint Brush
Steps to Create One of Your Own:
(Once again, I apologize for not having pictures as I went through this process but I made this about a month or so ago and did not have the intent of blogging.)
  1. Paint your piece of wood so it can be drying as you are completing the other parts of this project.
  2. Cut out your letters or arrange pre-cut letters 
  3. Once paint is dry, use the small foam brush to apply the cut out letters onto your piece of wood. You may want to use a ruler to measure and center your letters.
  4. Then, measure and arrange your clothes pins. Attach them to the board using a hot glue glun.
(You could decorate regular clothes pins using paint pens, paint, Modge Podge, etc. if you do not buy them already decorated)


Wednesday, June 26, 2013

Letter Trays & Binder Clips!


Two posts in one day? Whoa...she is crazy. No, I just actually need to post these things before I forget...I am pretty bad about that. This evening, I had some extra time to finish my letter trays and decorated binder clips. I thought I would share these with you :) Once again, I cannot take credit for this mastermind creation. It was another idea inspired from Pinterest. What did I do before Pinterest?


Okay, first of all...I must say that school supplies really thrill me. I absolutely love going to the Dollar Tree and Walmart, scoring deals on supplies that I may not need at the time but can always find a purpose to use them. School supplies combined with my label maker my husband got me for Christmas? I'm unstoppable.

I purchased letter trays last year from Walmart. They looked something like this....
                                                   
Not very cute, right? Exactly what I thought but I decided to just go with them as I had already spent $10.00 on them. Whatever. They may work for others but for my 6th graders and myself, they did not do the job. They constantly fell over and would drop to the floor making loud noises. I decided I would stick it out but I vowed to do something different this upcoming year. I started to scour Pinterest for classroom organization ideas and I found the perfect letter trays for my classroom. What better than a DIY project?

On Pinterest, I discovered someone using 5-6 of the Medium Flat Rate boxes and stacking them on top of each other to create their own letter trays.
                                                                    
However, I did not want them to look like this in my classroom. See the ugly letter trays above to see why. I enjoy color and brightness in my classroom. Once again, I wanted a DIY project that included more than taping or hot gluing 5-6 boxes together.

My Letter Trays:


Materials Needed:

  • Medium Flat Rate Boxes (I got them for free from the local post office)
  • Scrapbook paper
  • Packaging Tape
  • Duct Tape
  • Modge Podge
  • Medium foam brush
  • Label Maker (optional)

Steps to creating these beauties: 
(I apologize for not having pictures during the process, I promise to get better...I didn't know I was going to blog about them at the time).
  1. Stack the number of boxes on top of one another. I have 5 boxes because I have 5 class periods.
  2. Use packing tape to tape the boxes together, tightly. This gives you the basic framework.
  3. Measure and cut down your scrapbook paper. 
  4. Use a medium foam brush to apply a coat of Modge Podge onto the paper and the box.
  5. Use your duct tape to cover the sides and back of the box. I extended the duct tape into the boxes. In the picture, you can see the inside of the cardboard boxes but when just putting papers in it, you'll not see it.
  6. Using the medium foam brush Modge Podge scrapbook paper into the inside of the boxes to give it something extra.

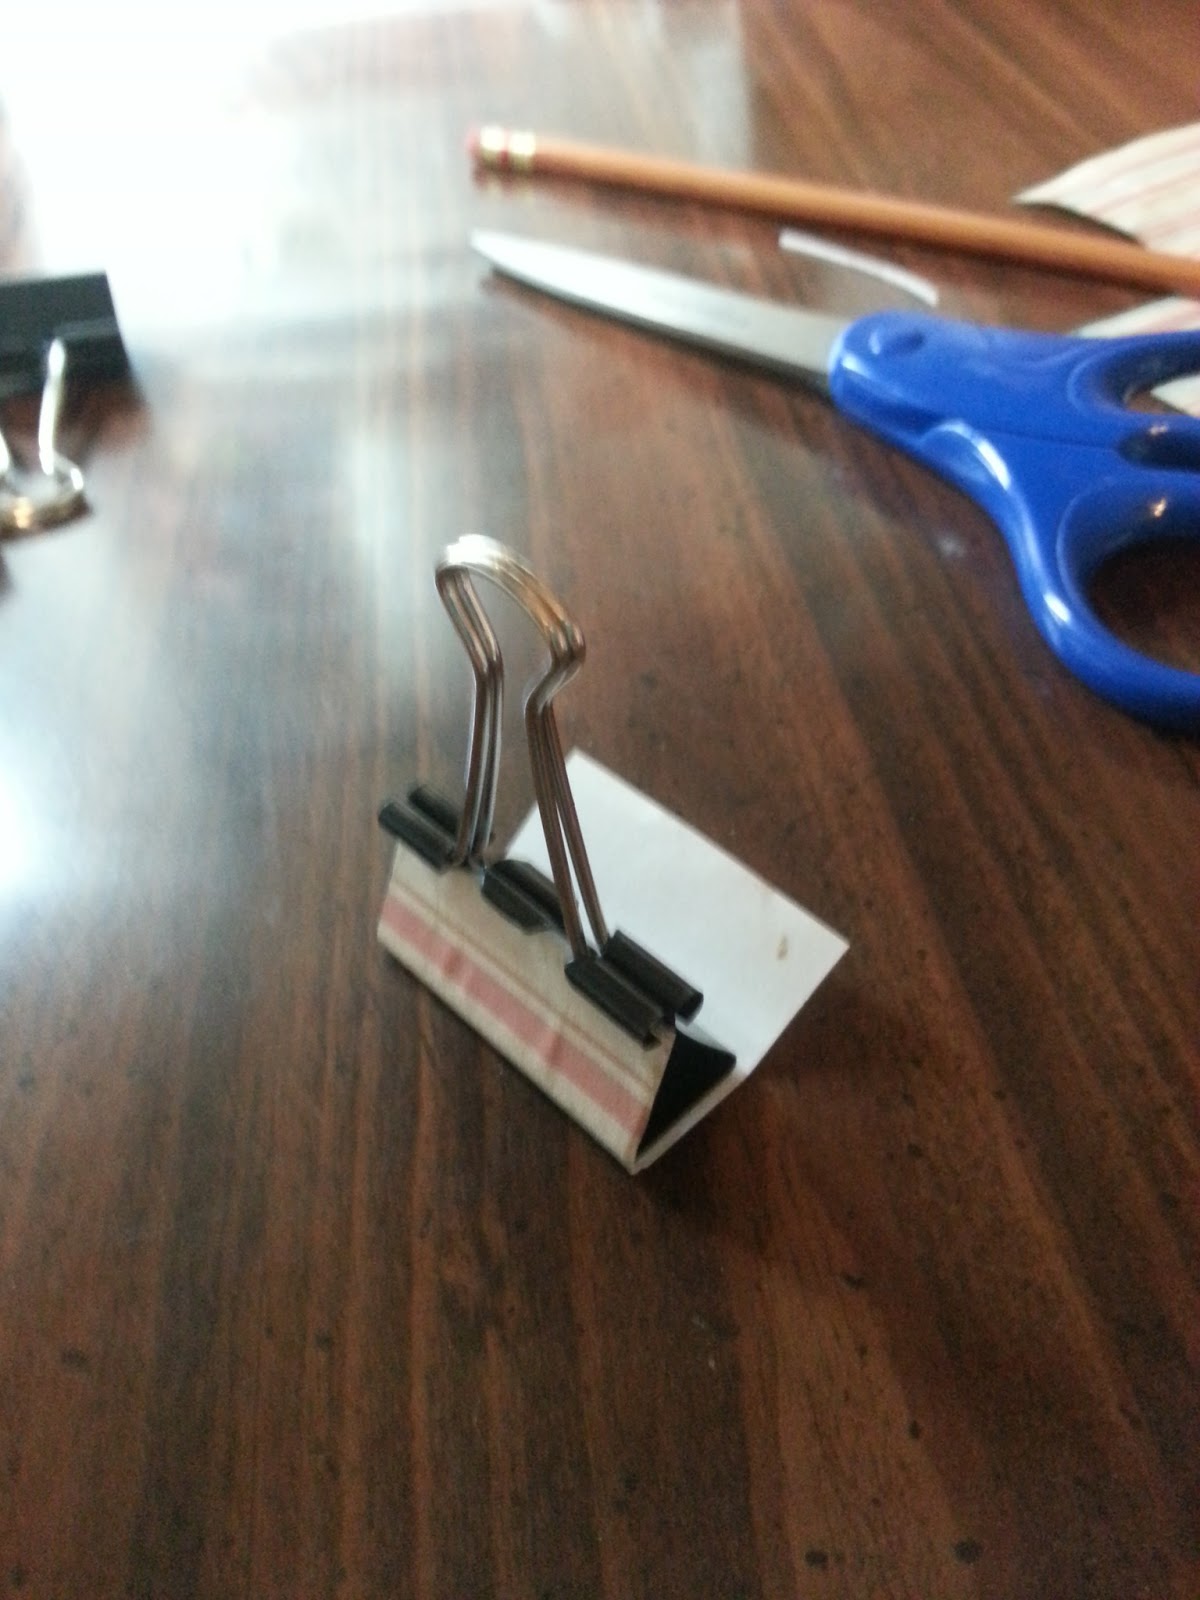
After I created these letter trays, I wanted a way to mark which period the papers need to go into. Now, you may be thinking...can't the kids just count and put the papers in the right slot? The answer would be no. I have learned it is better to label, label, label! I decided to decorate binder clips to show the students their designated tray.


Materials Needed:


  • Binder Clips (8 pack, 41MM $1.00 at Dollar Tree)
  • Small Foam Brush
  • Pencil
  • Scrap Paper (any color, I used scrapbook paper)
  • Modge Podge
  • Scissors

Steps to Creating:

Measure paper to cover the binder clip and cut it.

Use the foam brush to apply a thin layer of Modge Podge onto one side of the binder clip, then press paper onto the binder clip.


Complete one side at a time to make sure the paper has been applied evenly.

Complete steps for the remaining binder clips. Once again, I did 5 because I have 5 class periods.


The next step is optional. I used my amazing label maker to print out the labels to put onto these binder c lips.


Finished Products:


Owl'll Decorate For You...

I have decided to create this blog as a space to showcase various ideas I have brought to life from Pinterest, friends, and/or other teachers. I am creating this over the summer with the intent of blogging frequently. However, as most teachers will attest to, we all have great plans and intentions over the summer but once August rolls around.....who knows? I know I like to write and craft and enjoy looking at other middle school blogs so I thought "why not try one of my own?" We will see how it goes. My only regret is not saving pictures of everything I have created in the past for my classroom; better to start later rather than never, I suppose.


The first craft I would like to share is my pride and joy I made last summer. I wanted to do an owl theme so I was playing around on Pinterest, naturally, when I discovered owls made out of paper lanterns. The obsession grew. Often times when I make things I struggle with the fear of it not turning out. However, I must say, these owls are probably the cutest thing I have ever seen (next to my nieces and nephews, of course).

 I have three and they hang next to each other in my classroom from the ceiling. The medium owl is missing from this picture and I apologize not having one of my owls hanging from the ceiling :(

Materials Needed:

  • paper lanterns (any color), I found mine at Hobby Lobby (always remember to get that 40% off coupon!) Mine were three sizes (small, medium, and large)
  • scrapbook paper (your choice!)
  • foam squares (any colors!)
  • eyeball stickers
  • glitter pens (optional)
  • glue gun & glue sticks
  • fishing wire 

Steps to creating these little darlings:
  1. Cut your scrapbook paper to make the wings
  2. Cut the foam squares to make the eyes, nose, ears, and feet (I used pink glitter foam for the ears to give it something extra!)
  3. Arrange and glue the pieces onto your paper lantern using a hot glue gun (be careful, it comes through the thin paper lantern material and can get very hot!)
  4. Place your eyes onto the circle foam pieces.
  5. Decorate the chest of the owl using a glitter pen.